Concrete installation is not nearly as straightforward as it seems. There is a wealth of preparation that occurs before a single drop of concrete is ever poured onto the site. Everything from the mix design, quantity of concrete to purchase, site preparation, tools, weather forecast, placement process, form removal and curing process need to be considered in advance. And what works for one site may not work for another.
Here we’ve compiled the top 16 mistakes people make when installing concrete in hopes of helping you avoid some costly and frustrating headaches.
1. Not understanding how much concrete is really needed for a project.
Concrete always has three dimensions, and one of the first mistakes people make when choosing concrete is to underestimate how thick the concrete needs to be for their project. Decorative or non-load bearing concrete can be more or less superficial, but dimensions are crucial for floors, foundations, driveways and load bearing supports.
The exact thickness depends on how much weight the concrete will support. Driveways that handle heavy traffic from dump or trailers need to be thicker than driveways intended for a four-door sedan, for example.
Common slab thicknesses include:
4 inches for sidewalks
6 inches or more for residential driveways
8 to 10 inches for commercial driveways
10 to 12 inches for loading docks or dumpster pads
A concrete calculator can be used to help translate a three-dimensional measurement into cubic yards of concrete, but be sure to enter the correct thickness for your project. Concrete that is too thin for its intended use will easily crack and collapse.
2. Not rounding up an order of concrete.
Concrete dries out quickly, which leaves no time to make mistakes or adjustments once it has been poured. When placing an order for concrete, don’t try to be economical or exact. Err on the side of caution and order slightly more concrete than you think you’ll need. If the measurements were a little off, the extra concrete will come in handy. If the measurements were perfect, the driver will haul away any extra concrete.
3. Thinking all concrete is the same.
There is much more to concrete than meets the eye. Depending on the purpose of the concrete, different mix designs may be required.
Concrete is composed of the same three basic ingredients:
Sounds straightforward, right? In fact, there are five major types of Portland cement, as defined by the American Society for Testing and Materials (ASTM):
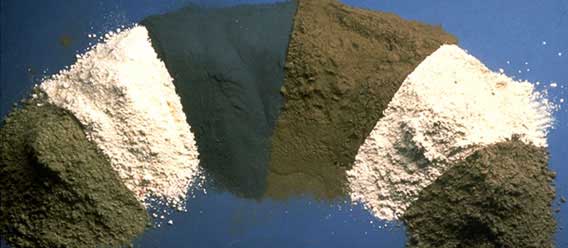
Type I: general purpose, suitable for most buildings, bridges, pavements, etc.
Type II: moderate sulfate resistance, suitable for concrete exposed to either soil or water that contains sulfate ions
Type III: high early strength, suitable for cold weather concreting and rapid construction
Type IV: low heat of hydration, a rare type used in building dams
Type V: high sulfate resistance, suitable for concrete exposed to high levels of sulfate ions
Beyond the three basic components, there are also additional ingredients known as admixtures. Admixtures give concrete additional properties or strengths and make it suitable for a range of different applications.
Admixtures fall into one of seven major categories:
Accelerating additives make the curing process, which can take anywhere from 3 to 14 days, happen much faster. This is particularly useful when trying to install new concrete in adverse weather conditions, as the curing process is crucial for concrete to reach its potential strength and can be affected by freezing temperatures
Air entrainment is a type of additive that improves concrete’s ability to withstand the freeze-thaw cycle, thereby reducing cracking. Air entrainment offers a number of other benefits, including improved workability, improved durability, reduced bleeding and reduced segregation.
Corrosion-inhibiting admixtures are used in reinforced concrete to slow the corrosion of the steel reinforcements. Corrosion-inhibiting admixtures are particularly useful in underwater concrete structures or those that are exposed to the elements, like highway bridges and parking garages.
Retarding additives give the opposite effect of accelerating additives, because they slow the concrete’s setting rate. They are useful in hot weather conditions, which make concrete dry out and harden faster than desired.
Shrinkage-reducing admixtures combat the shrinkage that occurs when concrete dries, thus reducing cracking and increasing durability.
Superplasticizers give temporary workability to low-slump concrete, making it easier to pour and place. Superplasticizers only work for around 30 to 60 minutes, after which the concrete returns to its original state of low fluidity and becomes very difficult to work.
Water-reducing admixtures affect the water/cement ratio in order to produce concrete that is easy to work with but that has the properties of concrete with less water and a denser cement paste.
4. Failing to have all of the proper tools on hand.
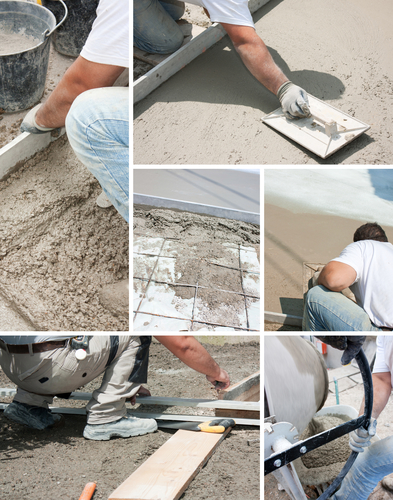
One thing that must always be kept in mind is the narrow window of time in which concrete can be worked once poured. Preparation is of utmost importance when installing concrete. Failing to have proper tools on hand can result in subpar installation and a waste of time, effort and money. There is no time to make a quick trip to the hardware store to buy a forgotten tool, and there is no time to experiment with tools not intended for use with concrete.
Check and double check that all tools are on hand, and that their use is fully understood by all team members, before beginning concrete installation. Common tools include industrial-grade wheelbarrows; trowels designed for concrete; a darby, bull float and/or hand float; a screed board; a concrete rake and broom; and of course protective boots, gloves and other gear.
5. Underestimating the importance of properly supported concrete forms.
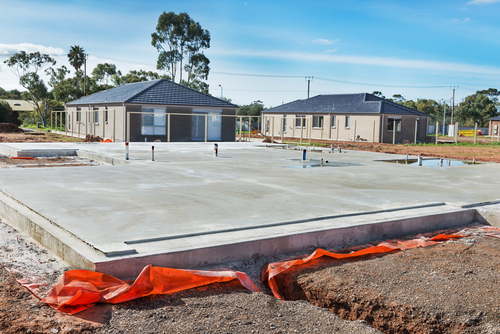
Concrete forms provide a “container” for the fluid concrete and hold it in the proper shape until it can hold its own weight after fully hardening and drying. Forms have to have tight joints to prevent concrete from leaking through, must be rigid to prevent the concrete from bowing out, and must be strong enough to hold the concrete firmly in place.
Crucially, forms must also be level where appropriate and must have adequate support or bracing. Careful construction of concrete forms ensures that the finished concrete product will be correctly shaped, which affects its overall strength and durability.
Forms are most often made from softwoods like spruce, fir and pine, but they can also be made from fiber, clay or metal. When using wood forms, smoothing the side that faces the concrete is recommended, as is creating a watertight tongue-and-groove joint. Braces, spreaders, stakes, tie wires, tie rods and other forms of support keep the forms in their proper shape until the concrete has been poured and/or hardened.
To promote easy form removal, treat the forms with light bodied petroleum oil (or shellac if using plywood). The oil not only prevents the concrete from sticking to the forms, but also prevents wooden forms from absorbing water, which could lead to warping. During the curing process, the concrete should naturally contract slightly, pulling away from the forms and making it easy to pop them off. Using a wooden wedge to help pry the form away from the concrete in order to avoid breaking the concrete edge.
6. Rushing to pour concrete without proper site preparation.
Pouring concrete is the exciting part, and it’s tempting to rush ahead to that step. But improper site preparation can cause numerous headaches. Take the time to correctly prepare the site for best results.
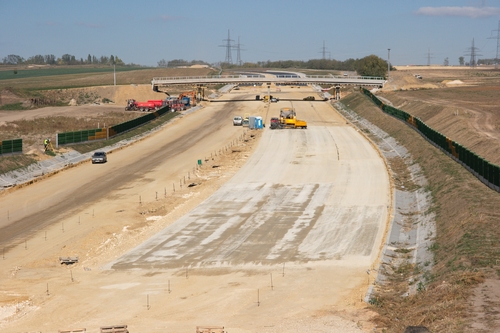
Concrete needs to be placed on a level, well-drained and compacted surface for best results. This requires some land clearing to remove soft top soil as well as any roots that may interfere with the concrete in the future. Then the area must be leveled. It is more common to remove dirt than to add dirt to accomplish this. Several inches of gravel is commonly placed over the dirt and then compacted to prevent the concrete from shifting and cracking.
Gravel also promotes drainage of water that may end up under the concrete structure. But because water can cause the ground to swell, which can also make the concrete shift and crack, it is wise to create a drainage channel around the concrete in order to help water flow around and away from the concrete.
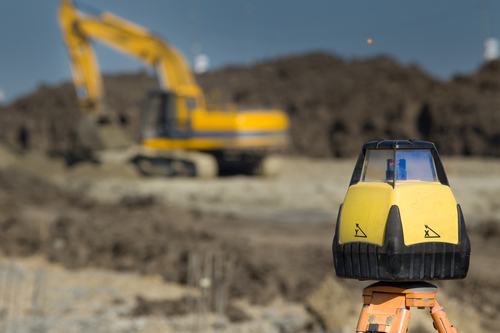
Only when the area is completely level and compact should the concrete forms be constructed.
7. Failing to use reinforcement when needed.
Concrete may seem like a strong, durable, everlasting material, but it does have one major weakness: it is prone to cracking. Reinforcing concrete with steel is a common practice because the properties of steel complement those of concrete, and the two materials are easy to work with. Steel has high tensile strength and concrete is capable of bearing heavy loads without being compressed. Together, they create a superior building material: reinforced concrete.
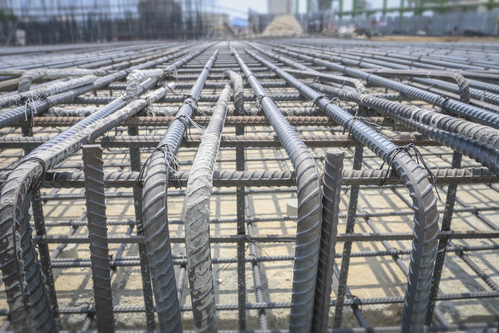
Reinforced concrete allows skyscrapers to reach unbelievable heights, but it is just as smart to use it in projects a little closer to the ground. Bridges, staircases, tunnels and floors all benefit from steel reinforcement. For longevity and safety, most non-decorative uses of concrete require some level of steel reinforcement.
Rebar, steel mesh, steel fiber, cellulose fiber, recycled carpet fiber and glass fiber are most commonly used and each has its own unique way of being integrated with the concrete for best results.
8. Placing steel mesh reinforcement incorrectly.
Steel mesh is just one concrete reinforcement option, but it is particularly popular because it can be bent to fit many shapes, like columns or walls.
But for best results, steel mesh needs to be contained in the center of the concrete, not near the bottom or near the top.
Instead, a little more than half of the concrete should be poured before the steel mesh is placed on top. Then the remainder of the concrete is poured on top. The weight of this concrete will push the steel mesh down slightly, therefore landing it more or less in the center. Steel mesh “sandwiches” can also be placed before any concrete is poured, but for a single sheet of mesh, the above method is sufficient.
9. Trying to do the work alone.
Concrete is a time-sensitive material. There is a limited amount of time in which concrete remains malleable. Never plan to pour and finish concrete on your own. Doing so only opens the door for expensive, time-consuming problems. Plan to do it right or not at all.
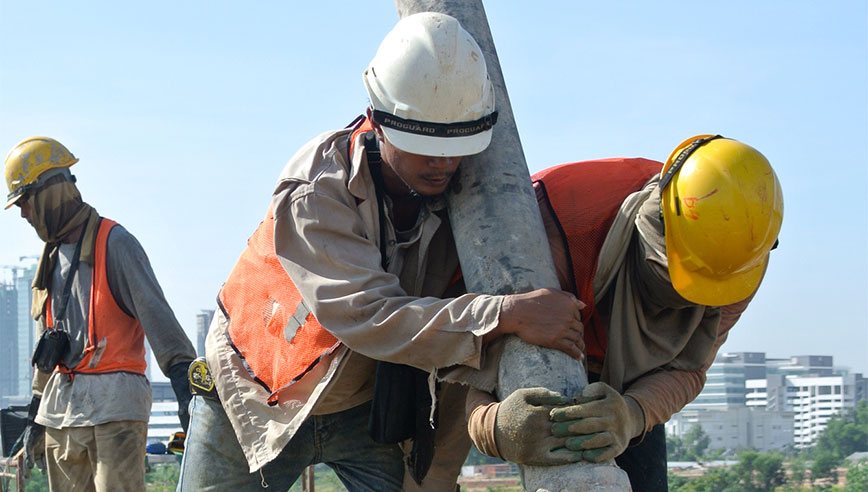
Find as many people as possible as you can to pitch in. Once you think you have enough people, find a few more. Err on the side of having too much help rather than not enough. Failure to properly finish concrete once it has been poured can result in concrete that is weaker than expected, brittle, prone to weather damage, lumpy, not level, etc. It is better to be safe than sorry.
10. Using an incorrect water / cement ratio.
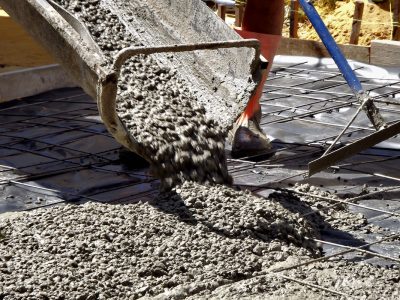
The water / cement ratio compares the weight of water to the weight of cement in the overall concrete mixture. The water / cement ratio affects the concrete’s workability, setting time, strength and durability.
Uniform Building Codes dictate what the proper water / cement ratio should be in various circumstances. In general, a water / cement ratio of .50 is sufficient. Higher water ratios can lead to cracking due to excess shrinkage from water evaporation, whereas lower water ratios can result in concrete that is difficult to pour and maneuver. Admixtures can be used to improve the workability of concrete without affecting the water / cement ratio.
11. Trying to pour concrete in poor weather conditions.
Warm, rain-free days are ideal for pouring concrete. In fact, a stretch of at least three days without extremely hot weather, freezing temperatures or rain in the forecast is preferred.
The temperature of the concrete within the first 24 to 48 hours determine whether the concrete will reach its strength potential. Concrete that freezes within this period of time weakens substantially, so steps must be taken to insulate the concrete. Polystyrene foam insulation board, insulation blankets or heated enclosures can be used to retain heat in cold weather.
Hot weather, on the other hand, causes water to evaporate off of the concrete too quickly. The curing process requires concrete to stay wet for a number of days. Sprinklers can be used to keep the area constantly moist, or a covering can be placed over the concrete to retain moisture.
Of course, rainy days pose a challenge because the extra water can skew the delicate cement / water ratio of the concrete when it is poured. It is wise to reschedule pouring outdoor concrete in such weather conditions, but a waterproof enclosure may suffice.
In the end, there are usually more days in a year that are troublesome for concrete than days in which the weather is perfectly suited for the purpose. Know that the weather affects concrete’s strength in the early days and which precautions to take.
12. Walking away after pouring concrete.
Concrete has liquid properties when it is freshly mixed, but pouring it won’t result in a level, even surface without a little bit of work.
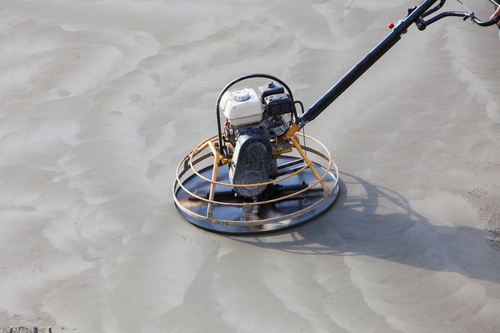
Whether the concrete is poured directly into the forms from the ready mix truck or is transported there via wheelbarrow or pump, the concrete should be placed as close to its final resting point as possible. Concrete that is pushed around excessively can become overworked and prone to cracking. Special concrete rakes can be used to lightly manipulate the concrete to reduce air pockets.
Once the concrete reaches the top of the form, a screed board is run along the top of the concrete to level it out. Use a darby, bull float or hand float to adjust any areas that may have air pockets or need additional smoothing, being careful not to spend too much time in any single area.
Once the bleed water comes to the surface and evaporates, add texture for traction. A concrete broom can be lightly dragged at a 90 degree angle to the concrete surface to create traction ridges. Or, decorative stamping can be carried out at this time.
Finally, the curing process needs to be considered. A wet cure is most common. That means you will need to set up a method to either keep the concrete consistently wet, or to retain moisture in the concrete.
13. Removing forms before the concrete is truly dry.
The forms or “molding” that holds the concrete in place until it dries should be left alone for at least two days to ensure that the concrete is completely dry. If the forms are removed too soon, the concrete can begin to sag, crack and collapse, especially if conditions like temperature affected its strength. As exciting as it is to see the finished product, be patient. In fact, as you’ll find out below, concrete requires attention even after the forms are taken off.
14. Overworking the concrete.
Concrete does need a little bit of extra attention after it has been poured, but if it is moved around too much or “overworked,” multiple problems can occur. In addition, trying to move through the finishing steps too soon can compound those problems. Avoid touching the concrete after bull floating until the bleed water disappears, as the following can occur:
15. Creating a slippery finish for walkways.
For concrete slabs in particular, a textured finish is a matter of safety, not just something that looks good or adds visual interest. Smooth concrete can be very slick and slippery, but textured concrete provides greater traction. An easy way to add texture is to run a concrete broom across the surface before the cement hardens.
Texture can also be added to concrete with decorative overlays, which can make the concrete look like stones, tiles or bricks. A third method is to add a gritty material to the sealer before application, or to use a conditioner that already has a non-slip additive within the formula.
A roughened texture is less important for other concrete uses and may actually be wholly undesirable, such as in concrete countertops. A smooth, slick surface can be accomplished if desired.
16. Being impatient during the curing process.
Pouring, setting and finishing concrete is hard work, and it’s tempting to consider the project “done and dusted” once the concrete is visibly dry and load bearing. However, it needs additional care, and this is called curing.
Curing concrete ensures it reaches its desired strength without cracking or turning brittle. Different types of concrete have different minimum curing times recommended by the American Concrete Institute (ACI):
Concrete does not reach its greatest strength when there is a disparity between moisture content during the curing process. The water integrated into the original mix evaporates from the surface and may cause cracking if some of the water is not replenished to restore some of the balance between the interior and surface of the concrete. The proper temperature (greater than 50 degrees Fahrenheit is a general guideline) must also be maintained, which makes it crucial to pour concrete in ideal weather conditions and with a promising weather forecast.
Curing can be accomplished by keeping the concrete continuously wet, by using a covering to prevent evaporation, or by using a chemical enhancement.
All things considered, it’s important to know what type of concrete you are working with and to be patient enough to allow the concrete to cure for the minimum recommended timeframe.
In Short: Preparation Pays Off
Enjoy your concrete creation!
Copyright © 2023 Texcon Ready Mix Inc. All Rights Reserved.